Grain cleaning is an essential step in ensuring the quality and safety of grains, whether you’re milling them for personal use or selling them. Dirty grain can attract insects and fungi that might damage the grain and result in poor milling output and quality. As someone who enjoys milling grains at home, I’ve picked up several techniques to ensure that my grains are clean before processing.
Cleaning grains at home can be done in several ways, with one of the simplest being manual winnowing. This method makes use of the difference in weight between the grain and lighter materials like chaff, unfilled grains, and different debris. By carefully pouring the grain from one container to another in front of a fan or natural breeze, the lighter materials are blown away, leaving behind cleaner grain.
In addition to manual winnowing, other methods like using grain cleaning equipment can significantly improve the cleanliness of your grains. These devices are designed to get rid of unwanted materials such as weed seeds, soil, and other non-grain materials, helping preserve the quality of your grains and ensuring a better milling experience. While some equipment can be pricey, it’s an investment worth considering if you’re milling large quantities of grains at home.
Understanding dirty grains
As someone who enjoys milling grains at home, I’ve learned a thing or two about what it means when we say “dirty” grains. In this section, I’ll help you understand the causes of contamination and the different types of impurities in grains.
Causes of contamination
Contamination in grains can happen at any stage, from harvesting to storage. Factors that contribute to grain contamination include:
- Harvesting practices: If grains are not harvested at the right time or with proper equipment, they can get mixed with other plant materials, dirt, and even insects.
- Storage conditions: Grains stored in damp or unclean environments can attract pests and develop mold or fungi, which can lead to the presence of mycotoxins. To prevent this from happening, it is essential to store grains in clean, dry places.
- Transportation and handling: The transfer of grains between containers and trucks can introduce impurities, especially if the equipment used for handling grains is not properly cleaned.
Types of impurities
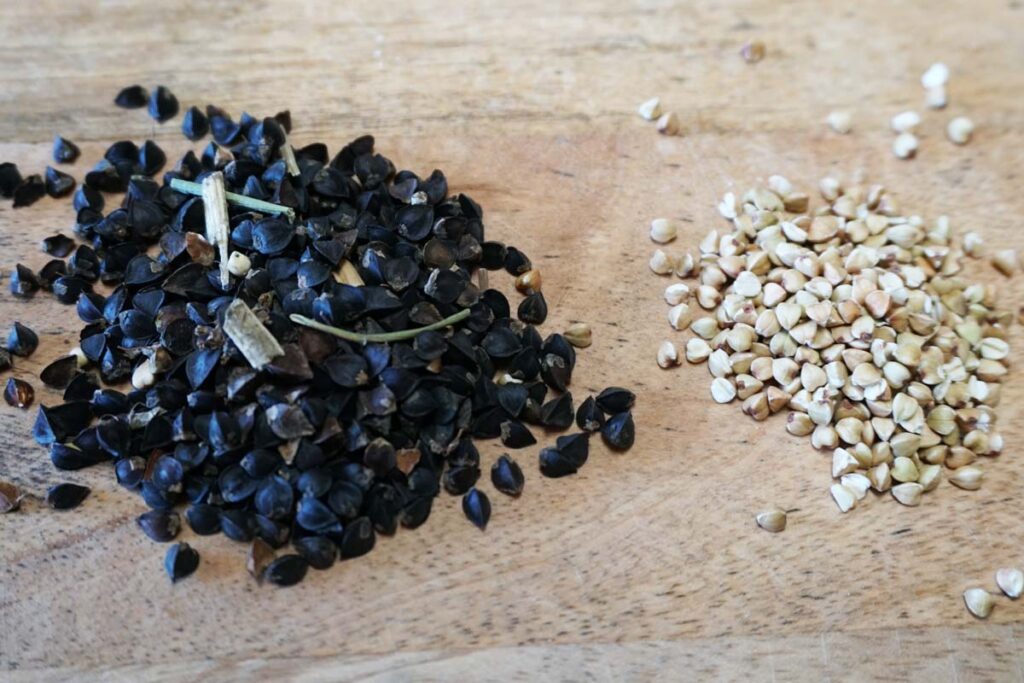
When milling grains at home, you might encounter these common impurities:
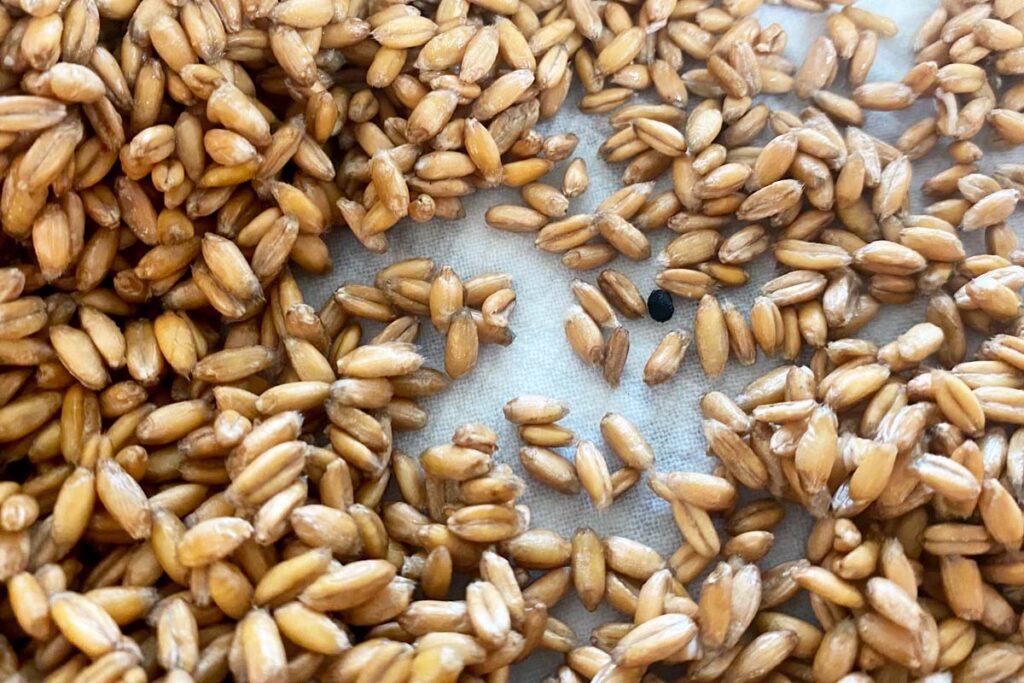
- Foreign materials: These can include stones, dirt, chaff, and other plant materials that have accidentally mixed in with the grains during harvesting or storage.
- Unfilled or broken grains: Lighter grains that didn’t develop properly or have been damaged are considered impurities because they can negatively affect the quality and output of the milling process.
- Insects, larvae, and pests: Sometimes, grains can get infested with insects or attract rodents, which can introduce droppings and other contaminants.
- Mold, fungus, and mycotoxins: Grains stored in moist, unclean environments can develop fungal growth leading to mycotoxin production. These substances are harmful and can cause health issues if ingested.
Cleaning equipment and tools
As someone who loves milling grains at home, I’ve learned that having clean grains is essential. In this section, I’ll cover some key cleaning equipment and techniques that will help you achieve the best milling outcome.
Sieves and strainers
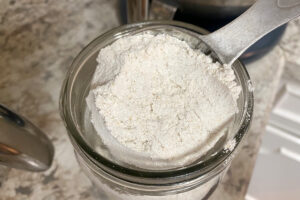
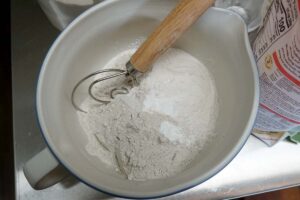
I often use sieves and strainers in my grain cleaning process to sift out smaller impurities, like dust and chaff, and ensure that my grains are free from unwanted debris. You can purchase sieves with different mesh sizes, which will allow you to remove various types of impurities. When selecting a sieve or strainer, make sure it’s sturdy and easy to clean.
Air separators
Another cleaning tool that I find useful is an air separator. This equipment uses air currents to remove lighter particles such as husks, dust, and chaff from the grains. Basically, I pour the grains into the air separator, and the air currents lift the lighter particles up and out of the mix, leaving behind clean grains. I especially like using this method because it’s efficient and doesn’t require much manual effort.
Stone removers
Lastly, I can’t stress enough the importance of removing stones and other large impurities from grains before milling. Having a stone remover is essential for protecting your milling equipment and ensuring a smoother, better-tasting final product. (No one wants to be eating ground up stones, but it is more likely to ruin your grain mill!)
Stone removers come in various designs, ranging from manual, hand-held devices to more advanced, automated systems. Choose a style that suits your cleaning needs and fits your budget.
By employing these cleaning tools in your grain preparation process, you can ensure a higher-quality final product when milling at home. Happy milling!
Basic cleaning techniques
Cleaning “dirty” grains at home is essential to ensure a higher quality product for milling. There are several basic techniques I’ve found particularly helpful. In this section, I’ll share my experiences with hand-picking, washing and soaking, and drying.
Hand-picking
Hand-picking is my initial go-to method for cleaning grains. I always start by spreading the grains on a clean surface, such as a tray or a large plate. Then, I carefully examine the grains and manually remove any visible contaminants like straws, chaff, or weed seeds. This simple technique lets me spot any larger impurities that might affect the milling process or the final product.
Washing and soaking
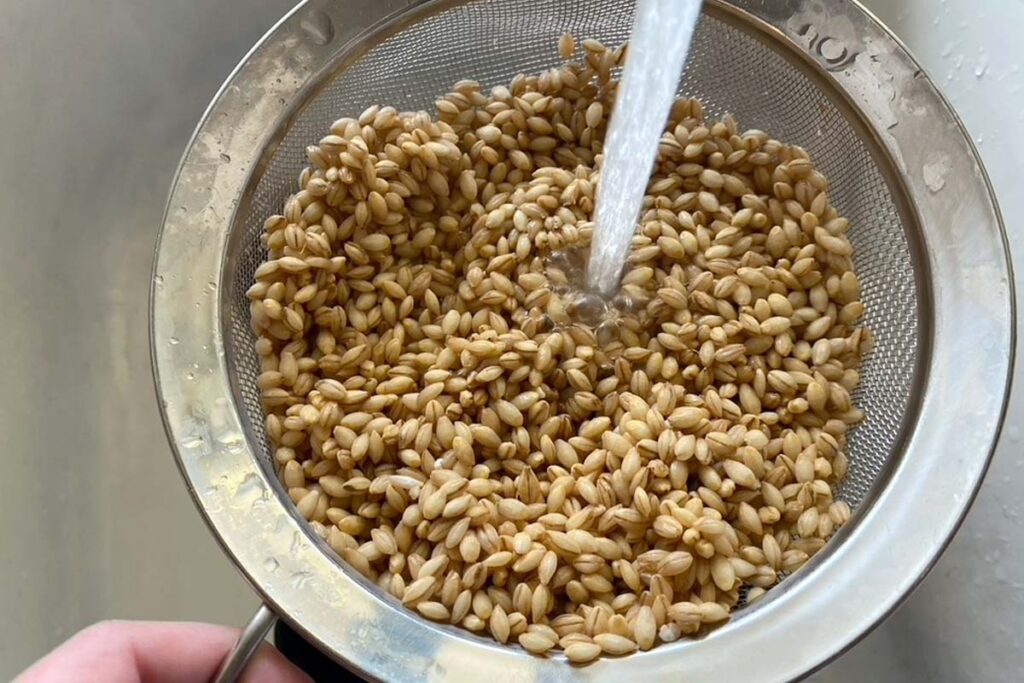
After hand-picking, I proceed with washing and soaking. I place the grains in a large bowl or a colander and rinse them thoroughly under running water. This helps remove any remaining dust, soil, or unwanted particles.
After rinsing, I usually soak the grains in clean water for a few minutes, agitating them occasionally to further loosen debris. As a side benefit, soaking also helps remove dust and insect fragments, resulting in a safer product.
Drying
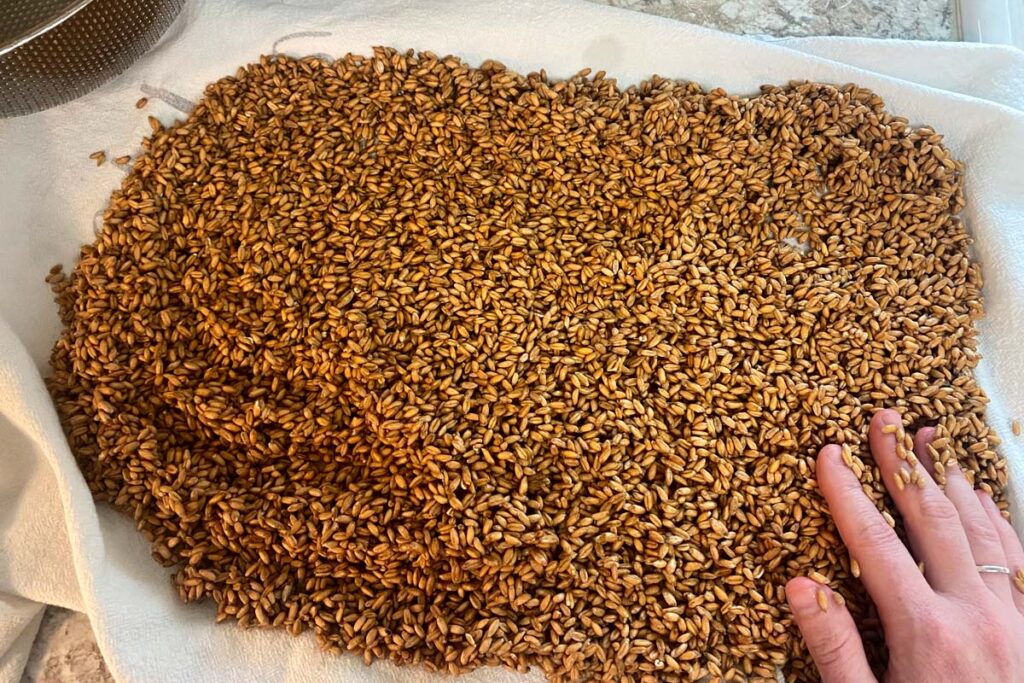
The final step in my cleaning process is drying the grains. This is an important step because you do not want to put damp grains in your grain mill, so make sure your grains are fully dry before moving on.
To do this, I spread the cleaned and soaked grains out on a clean towel or paper towels and allow them to air-dry. It’s essential to ensure the grains are thoroughly dried before moving on to milling, as any residual moisture can impact the milling process and create clumping.
Other ways to clean your grains
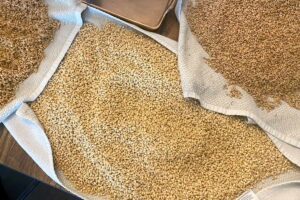
Sometimes you need to clean your grains more than a simple pick through and wash. By using techniques such as destoning and air separation, you can effectively clean my grains and improve the final product.
Destoning
If you are doing a bigger batch of cleaning, picking stones out by hand is not effective. You can invest in a small-scale destined to help you with this process. I have never needed to do this, but I wanted to mention this in case you are looking for something to help you with this process.
Air separation
Another advanced cleaning technique I like to use is air separation. This method helps to remove lighter contaminants like dust, chaff, and husks from the grains, ensuring a cleaner product.
(This is old-school and has been done for thousands of years! It reminds me of what I read in the Bible or see in old movies!)
Here’s how I perform air separation:
- Get an air separator: You can literally do this on a windy day or use a fan
- Adjust the settings: Try your fan settings until you can find a balance that is light enough to not blow the grain away while a heavy enough setting to blow the chaff away
- Monitor your grains closely: Watch what you are doing, making sure you don’t lose valuable grains
Safety and precautions
Hygiene basics
Before starting the milling process, it’s essential to ensure proper hygiene. I always make sure to wash my hands thoroughly and clean all surfaces and equipment that will come into contact with the grains (I have a glass spray bottle that is 50% vinegar and 50% water–I use this to sanitize my work surfaces with a cleaner that won’t be harmful if ingested.)
Moreover, it’s crucial to inspect the grains for any signs of contamination, such as mold, insects, or strange odors. (I talk extensively about how my grains and flours were ruined with pantry moths here.) If I notice any of these, I discard the affected portion or the entire batch to avoid potential health risks.
Storage and preservation
After cleaning the grains, it’s important to store them properly. I personally store my grains in a cool, dry place away from direct sunlight and moisture (which is my garage … it can get a little warm during the Texas summer, but it’s the best place I have). This helps prevent the growth of mold and keeps the grains fresh for longer. Airtight containers or vacuum-sealed bags work well, as they keep out unwanted pests and maintain the quality of the grains.
When it comes to preserving milled flour, I make sure to use clean containers with tight-fitting lids. This helps protect the flour from moisture and keeps it fresh for future use. I also recommend labeling the containers with the type of grain and date of milling to ensure proper rotation and avoid using stale flour.
You can read more about how I store my whole grains here and how I store my flour here.
Using clean grains for milling
As a home miller, I’ve learned that using clean grains is crucial for producing high-quality flour. In this section, I will share with you some tips on grain selection and milling process to ensure your grains are ready for milling at home.
Grain selection
The first step to milling clean grains at home is selecting the right raw materials. I always try choosing grains that are free from contaminants like straws, chaff, weed seeds, soil, and other foreign materials.
Here are some tips for grain selection:
- Buy grains from a reputable source known for providing clean, high-quality grains
- Look for uniform size, shape, and color, which indicate fewer impurities
- Inspect the grains visually for any signs of mold, insects, or damaged kernels
- Smell the grains, as any unusual odors may suggest spoilage or contamination
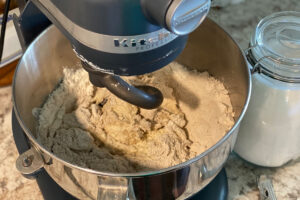
Milling process
Now that I have selected good-quality grains, it’s time to focus on the milling process. Keeping the milling equipment clean is essential for preventing cross-contamination and achieving the desired flour quality. Maintaining a clean, well-maintained mill is just as important, if not more so, than having good-quality grains to begin with.
Here’s what I do during the milling process to ensure clean grains:
- Make sure you keep it clean. I make it a habit of vacuuming around my mill to keep stray wheat berries and flour dust to a minimum. I don’t want to attract pests and this helps prevent mold
- Gradually feed the grains into the mill, as overloading can cause uneven grinding and potential contamination … One time I accidentally overfilled my hopper and grains went EVERYWHERE!
- Monitor the milling progress and make necessary adjustments to maintain a consistent output and quality
Frequently asked questions
How can I remove impurities from grains before milling at home?
One simple method I use to remove impurities from grains is winnowing, which separates lighter materials like chaff and debris from the heavier grains. I pour the grains from one container to another in front of a fan or gentle breeze. The lighter materials will be blown away, leaving the clean grains behind.
What is the process for cleaning grains before turning them into flour?
First, I sift the grains through various-sized sieves or screens to remove larger impurities such as sticks, stones, and insect parts. After sifting, I winnow the grains to remove lighter materials, then I wash them with water to remove any remaining dirt and dust. Finally, I dry the grains thoroughly to prevent mold or spoilage before milling.
Are there any tools or methods to clean home-milled grains?
In addition to sifting and winnowing, I find that using a vacuum cleaner with a brush attachment can be helpful for removing dirt and debris from grains. Small grain-cleaning machines are also available for those who mill grains regularly at home, but they might be an unnecessary expense for occasional users.
What precautions should I take when milling grains at home?
When I mill grains at home, I always make sure to wear a mask and goggles to protect my eyes and lungs from dust. Also, I ensure proper ventilation in the milling area to avoid inhaling fine particles. Finally, I keep my milling equipment clean and dry to prevent contamination and mold growth.
Is there a simple way to clean grains without a professional grain cleaner?
Yes, as I mentioned earlier, I use sifting and winnowing to clean grains without the need for a professional grain cleaner. Experimenting with different sieve sizes and adjusting the air flow from the fan during winnowing can help optimize the cleaning process.
How can I ensure my home-milled flour is free from debris and contaminants?
By following the steps I outlined above (sifting, winnowing, and washing), I can significantly reduce the number of contaminants in my home-milled flour. However, it’s essential to keep in mind that some impurities may still be present. As a precaution, I store my home-milled flour in airtight containers and use it within a relatively short period to maintain freshness and quality.