As a corn enthusiast, I’ve learned that this versatile and delicious grain plays a significant role in our culinary world, especially here in North America. It’s not just about enjoying a buttery cob of sweet corn at a summer barbecue; corn has so much more to offer. From cornmeal and cornstarch to grits and cornbread, I’ve discovered how vital it is to know the ins and outs of sourcing, storing, milling, cooking, and baking with corn.
In my journey through the world of corn, I was amazed by the numerous options available for sourcing and selecting the perfect ears of corn. From farmers’ markets to our own backyard gardens, it’s essential to know how to pick fresh corn for our recipes. Additionally, understanding the proper ways to store corn and why milling techniques make a difference in our dishes helps ensure we make the most of this flavorful grain.
But it’s not just about the technical aspects; the joy of cooking and baking with corn is something I want to share with all of you. By diving into delightful recipes and mastering various cooking techniques, we’ll discover how corn can take our culinary creations to new heights. So let’s get started on this delicious adventure together!
Sourcing Corn
Selecting Fresh Corn
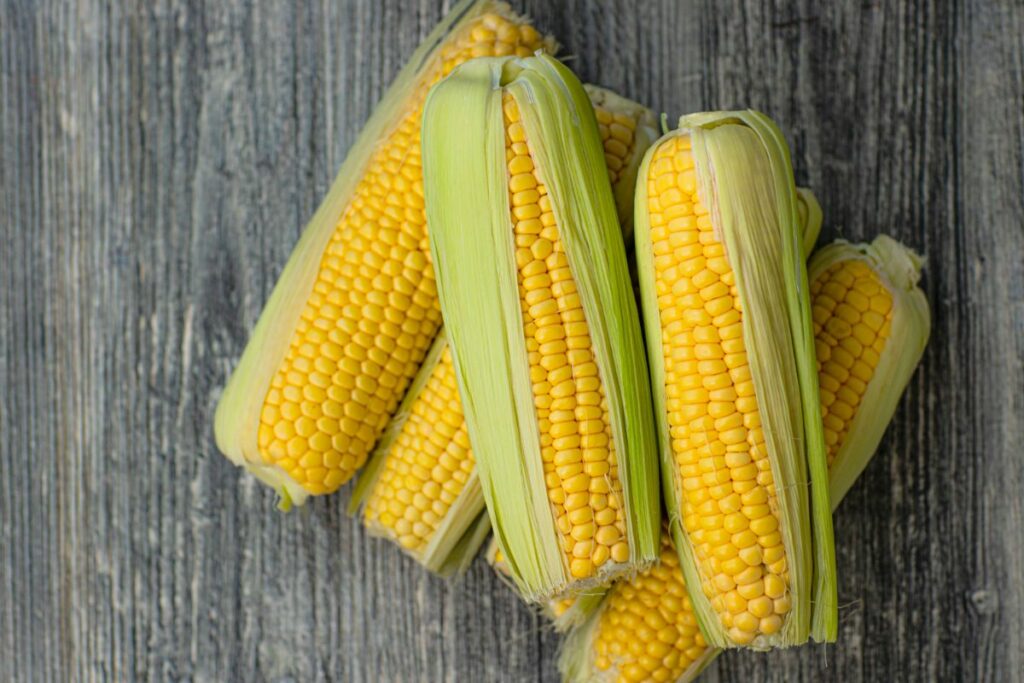
When I’m shopping for fresh corn, I personally look for bright green, tightly wrapped husks at the grocery store. The tassels, which are the delicate silk-like threads on top of the husk, should be slightly sticky and golden brown. I prefer to avoid corn with dry and browning husks.
Another tip I follow is to gently press on the kernels beneath the husk – they should feel plump and full, indicating the corn is fresh and juicy.
Finding Cornmeal and Flour
In my experience, most grocery stores carry cornmeal and corn flour in their baking aisle, right alongside other flours and grain-based products. I often find both yellow and white varieties, as well as different levels of coarseness.
When purchasing cornmeal and corn flour, I make sure to check the packaging for any signs of moisture or tampering, and also pay attention to the expiration date, as corn products can turn rancid if stored for too long.
Exploring Specialty Corn Types
Sometimes, I like to explore specialty corn types for unique and mouthwatering dishes. For instance, blue corn is a fascinating variety used in tortillas, cornmeal, and corn chips. I’ve come across blue corn products at specialty food stores, farmer’s markets, or even online retailers.
Another intriguing type I’ve stumbled upon is sweet corn – the kind we all love to eat on the cob. I usually pick up fresh sweet corn from farmer’s markets during the summer season when it’s at its peak. It’s worth keeping an eye out for heirloom varieties like Glass Gem Corn, which features vibrant, jewel-like kernels.
By following these guidelines, I can ensure that I’m sourcing the best corn for all my cooking and baking needs.
Storing Corn
Refrigerator Storage
For me, keeping corn fresh is essential to enjoy its delicious taste. When I store corn in the refrigerator, I try to follow these tips:
- First, I keep the corn in its husk. This helps retain its flavor and moisture.
- Then, I place the corn in a plastic bag or airtight container to minimize the exposure to air.
- Finally, I store the corn in the crisper drawer of my fridge for up to 3-5 days. This way, it stays fresh and maintains its taste.
Freezing Corn
Sometimes, I need to store corn for a longer time. In that case, freezing is a great option. Here’s what I usually do:
- Remove the husk and silk: I carefully peel back the husk and remove the silk from the corn cob.
- Blanch the corn: I briefly cook the corn in boiling water for about 4-6 minutes, then transfer it to an ice bath to stop the cooking process. This step maintains the corn’s flavor and texture.
- Allow the corn to cool completely: After the ice bath, I lay out the corn on a tray or cooling rack to let it air dry. This ensures that the corn won’t stick together once it’s in the freezer.
- Cut the kernels off the cob (optional): For convenience and space-saving, I sometimes choose to remove the corn kernels from the cob. This step is optional, but I find it handy for using the corn in recipes later on.
- Place the corn in a freezer bag: Once the corn is dry and cooled, I put the whole cobs or kernels into a freezer bag. I squeeze out the excess air and seal the bag tightly.
- Label and date the bag: To keep track of my frozen corn, I make sure to label the bag with the date and contents, so I know when it’s time to use it.
- Store in the freezer: I place the freezer bag in a flat position to maximize storage space and to allow the corn to freeze evenly. This way, the corn can last up to 6-8 months in the freezer.
By following these storage tips, I am able to keep my corn fresh and flavorful, whether I use it in a few days or a few months.
Milling Corn
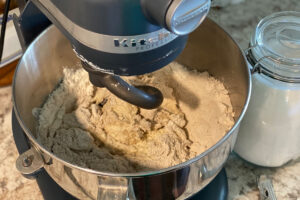
Choosing a Mill
When I started milling corn, I realized choosing the right mill is crucial for achieving the desired outcome. There are two common types of mills: stone and steel mills. Stone mills use natural stone for a grinding surface, giving cornmeal a unique texture and flavor. Steel mills, on the other hand, use high-speed steel rollers that generate less heat, which can help preserve the corn’s nutritional content. Some mills are even designed specifically for milling corn, like masa harina mills that produce the right texture for tortillas and similar dishes. My suggestion is to choose a mill that suits your needs, budget, and personal preferences.
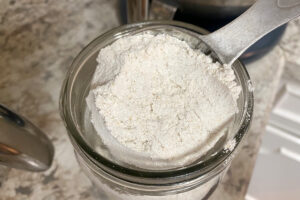
Grinding Techniques
Grinding corn can be done in different ways, depending on the desired result. For cornmeal, I use a coarser grind, which creates a slightly grainy texture – perfect for cornbread or polenta. For corn flour, a fine grind is what I go for. This results in a powdery texture, similar to wheat flour, suitable for baking and various recipes.
Here are some tips I follow while milling corn:
- Adjust the mill settings according to the desired grind size – coarse, medium, or fine.
- Mill the corn in small batches for better consistency and control.
- Sift the ground corn to remove any larger chunks that may have been missed.
- Store the freshly milled cornmeal or flour in an airtight container to preserve freshness and flavor.
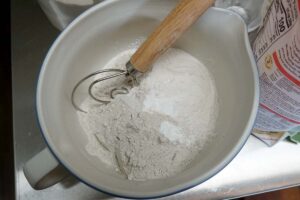
Preparing the Corn
Before milling, it’s essential to prepare the corn properly. It’s important to start with clean and dry corn kernels. I prefer to buy non-GMO organic corn, as it is free of pesticides and other chemicals.
For milling corn into masa harina, a specific type of cornmeal used in making tortillas, I follow the nixtamalization process. This traditional method involves soaking the corn kernels in an alkaline solution made of water and calcium hydroxide (or a similar agent), which helps break down the kernels’ outer layer. This process enhances the corn’s nutritional content, making it easier to digest and allowing the mill to produce a finer, smoother texture – perfect for masa harina.
With the right mill, technique, and preparation, milling corn can be a rewarding and delicious endeavor. I love how fresh cornmeal and flour enhance the flavor of my favorite recipes, and I hope these tips help you in your corn milling journey!
Cooking Corn
Boiling Corn on the Cob
I love boiling corn on the cob because it’s so simple and delicious. First, I remove the moist, bright green husks and the silks from the corn. Then, I fill a large pot with water and bring it to a rolling boil. I gently place the corn on the cob into the boiling water and let them cook for about 7-10 minutes, until the kernels are soft and plump. Sometimes, I add a pinch of sugar to the water to enhance the corn’s natural sweetness.
Grilling Corn
Grilled corn is a favorite of mine, especially during summer months. To grill corn, I first peel back the green husks without completely detaching them. I then remove the silks and brush the kernels with lime juice to prevent them from browning. After that, I pull back the husks over the kernels to protect them during the grilling process. I place the corn on the grill and cook it for about 15-20 minutes, turning them occasionally until they’re slightly charred and tender.
Sauteing Corn
Sauteing corn is another great way to enjoy this versatile grain. I start by removing the husks and silks before cutting the kernels off the cob. Using a frying pan, I heat a small amount of oil and add the corn kernels, cooking them for about 5 minutes until they start to brown slightly. Sauteed corn can be seasoned with various spices and herbs, like cumin or cilantro, to give it a unique and flavorful touch.
Baking with Corn
As a lover of corn and its versatility, I’ve discovered some amazing recipes that incorporate this delicious grain in various baked goods. In this section, I’ll share with you some of my favorite ways to bake with corn, specifically focusing on cornbread and muffins, tortillas, and corn-flavored desserts.
Cornbread and Muffins
Nothing beats the taste of freshly baked cornbread and corn muffins. The key to achieving the perfect balance of flavor and moisture is to use cornmeal with the right coarseness. My go-to ratio is 1:1 cornmeal to all-purpose flour for a wonderful texture. I also like to add a touch of honey or maple syrup for a hint of sweetness. Don’t forget to preheat your oven to 375°F and grease your pan or muffin tin.
- Tip: Before baking, consider soaking your cornmeal in limewater and buttermilk to unlock even more of those essential B vitamins.
Tortillas
Corn tortillas are a staple in many cuisines, and making them at home is simpler than you might think. The key ingredient is masa harina, a special type of cornmeal treated with an alkaline solution. To make the tortillas, simply mix masa harina with water until a soft dough forms. Divide the dough into small balls, then press each ball into a flat circle using a tortilla press or heavy skillet. Cook the tortillas on a hot griddle or pan for about 1 minute per side until they’re lightly browned and slightly puffed up.
- Tip: Store freshly made tortillas in a clean cloth or tortilla warmer to keep them pliable and ready for serving.
Corn-flavored Desserts
One of my favorite uses for corn in baking is incorporating it into sweet treats. Bonus points for using popcorn in the mix!
- Sweet Corn Ice Cream: Create a custard base infused with fresh corn kernels and corn cobs for an unmistakable, sweet corn flavor. Once the custard is chilled and churned, you can fold in caramelized popcorn for a delightful crunch.
- Cornmeal Cookies: These rustic cookies showcase the grain’s distinct taste and texture. Simply swap out a portion of all-purpose flour with cornmeal for a delightful change in your standard cookie recipe.
- Corn Husk Meringues: I find that the use of corn husks as a natural wrapper for tender, corn-infused meringues makes for a unique presentation and added aroma to my dessert platter.
Baking with corn is a fantastic way to experiment with flavors and textures in my recipes. It allows me to appreciate the versatility of this humble grain and celebrate its role in various cultures’ culinary traditions. Happy baking!
Preserving Corn
As a corn enthusiast, I’ve learned quite a bit about preserving this versatile and delicious grain to enjoy year-round! In my experience, there are two main methods to preserve corn: canning and drying. Let’s dive into each process and see how we can make the most of fresh corn all year long.
Canning Corn
Canning corn is a great way to extend the shelf life of fresh corn while maintaining its flavor. Here’s how I usually work through the process:
- Start by husking and cleaning the corn, making sure to remove all silks and dirt.
- Blanch the entire cobs in boiling water for a few minutes. This helps to preserve the color and flavor of the corn when canning. According to Utah State University Extension, it is recommended to blanch whole kernel corn for 4 minutes.
- Chill the corn in cold water after blanching, then drain the water.
- Cut off the kernels at about two-thirds depth, making sure to remove any excess liquid.
- Pack the kernels in clean and sterilized canning jars, leaving about 1 inch of headspace at the top.
- Process the jars in a pressure canner or water bath canner, following the manufacturer’s instructions.
Drying Corn
Drying corn is another excellent method I’ve found to preserve its flavor and make it convenient for storage. The process is pretty simple:
- Husk and clean the corn, removing all silks and dirt.
- Cut off the kernels, ensuring you get as much of the corn as possible.
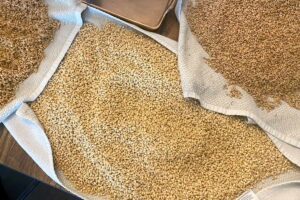
- Spread the kernels in a thin layer on a tray or drying screen, making sure they are not overlapping.
- Place the tray in an oven, dehydrator or a well-ventilated area to dry the kernels. If using an oven, set it at the lowest temperature and keep the door slightly ajar for airflow. It is essential to keep the corn in a cool, dry place while drying, as mentioned by Utah State University Extension.
- Check the corn periodically to make sure it is drying evenly and remove any kernels that might have spoiled.
- Once the corn is completely dry, store it in airtight containers such as glass jars, metal cans, or securely sealed plastic bags.
These two methods have been my go-to’s for preserving fresh corn. By utilizing both canning and drying, I’m able to enjoy the delicious taste of corn in various dishes any time of the year!
Conclusion
I have thoroughly enjoyed exploring the world of corn and its versatility in our diets. From learning about sourcing fresh and locally grown corn, to discovering various storage techniques and milling processes, I feel more confident in incorporating this delicious grain into my meals.
In my cooking and baking journey, I’ve come to appreciate the wide range of dishes that can be prepared with corn, such as cast iron skillet cornbread or simply boiled sweet corn. I believe that using corn not only benefits our taste buds, but also supports local farmers and reduces our carbon footprint.
Lastly, I can’t wait to continue experimenting with new corn-based recipes and discovering further ways of enhancing its flavors by pairing it with other ingredients. I hope that my enthusiasm and passion for corn has encouraged you to explore and enjoy this amazing grain in your own culinary adventures.
Frequently Asked Questions
What is the difference between flint corn and dent corn?
Flint corn and dent corn are two distinct varieties of corn. Flint corn, also known as Indian corn, has a hard, dense kernel that’s usually brightly colored. It is often used for ornamental purposes, and it’s resistant to cooler climates. Dent corn, however, is more common and used in food production; its kernels are softer and have a small dent on the top. Dent corn is the primary source of cornmeal, cornstarch, and other corn-based products.
Which techniques can be used to cook grains like pilaf and risotto?
Pilaf and risotto are two popular cooking techniques for preparing grains. In pilaf, grains are usually first sautéed in oil or butter with onion, then cooked in a flavored liquid like broth. This gives them a distinctive and rich flavor. Risotto, on the other hand, uses a similar method but involves gradually adding small quantities of warm liquid with constant stirring. This helps to release starch from the grains, giving risotto its creamy consistency.
What are the benefits of milling your own flour?
Milling your own flour provides several benefits, such as increased freshness, control over the coarseness of the flour, and retention of the grain’s nutrients. Freshly milled flour often has a richer flavor, and grinding your grain offers you the opportunity to experiment with a variety of textures. Additionally, store-bought flour can lose some of its nutrients over time, so milling it at home helps your baked goods retain their full nutritional value.
Which grains have a long shelf life and how to preserve them?
Most whole grains have a relatively long shelf life if properly stored. Some examples include rice, barley, quinoa, and oats. To preserve your grains, make sure to keep them in airtight containers, away from heat, light, and humidity. This will help prevent spoilage and preserve their freshness. USU provides helpful information about preserving corn specifically.
What additional ingredient strengthens gluten networks in baking?
Adding a small amount of vital wheat gluten to your baked goods can help strengthen the gluten networks, improving the overall structure and resulting in a more tender and chewy texture. This ingredient is particularly useful when working with whole grain flours or when trying to achieve a lighter texture for your baked goods.
How does milling of whole wheat work to make white flour?
The process of turning whole wheat into white flour involves removing the outer bran and germ layers of the wheat kernel. This leaves behind the starchy endosperm, which creates a lighter and finer flour. This Milling and Storage guide by Tufts Food Lab provides valuable insights into the whole grain milling process. Keep in mind that, despite its pleasant texture and versatility, white flour may lack certain nutrients found in whole grain flours, as these are mostly concentrated in the bran and germ.